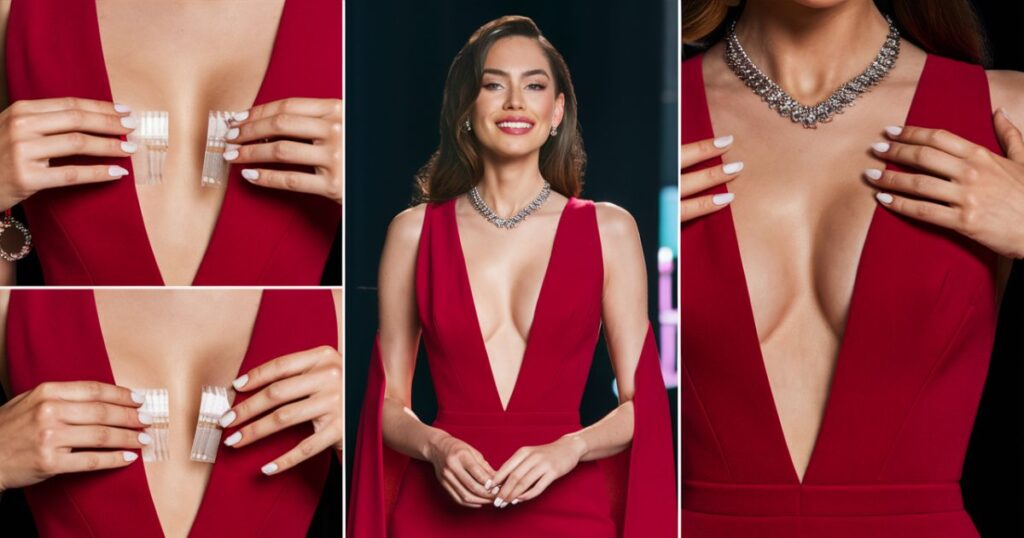
Plunging necklines can be a stunning and sexy addition to any outfit, but they often come with the challenge of keeping everything in place. Enter fashion tape – the unsung hero of daring fashion choices.
In this comprehensive guide, we’ll explore everything you need to know about using fashion tape for plunging necklines, ensuring you can rock that low-cut look with confidence and style. From understanding the basics to mastering advanced techniques, we’ve got you covered.
Understanding Fashion Tape
Fashion tape, also known as dress tape or body tape, is a double-sided adhesive designed specifically for use with clothing and skin. Unlike regular tape, fashion tape is skin-safe and gentle, making it perfect for securing clothing to your body without causing irritation or damage to delicate fabrics.
There are several types of fashion tape available in the US market:
- Pre-cut strips
- Roll tape
- Clear tape
- Nude-colored tape
- Extra-strength tape for heavier fabrics
- Hypoallergenic options for sensitive skin
- Waterproof varieties for swimwear or sweaty situations
The benefits of using fashion tape for plunging necklines include:
- Preventing wardrobe malfunctions
- Allowing for more daring necklines
- Providing invisible support
- Adapting to various fabric types and skin tones
- Enhancing confidence in your outfit
- Enabling movement without constant adjustments
While fashion tape shares similarities with other adhesive solutions like boob tape or gaffer tape, it’s specifically designed for clothing and is generally gentler on the skin and fabric. This makes it the ideal choice for delicate areas and fine materials often found in plunging neckline designs.
Preparing to Use Fashion Tape
Choosing the right fashion tape is crucial for success. Consider factors such as the weight of your fabric, your skin sensitivity, and the level of support needed. For plunging necklines, a stronger adhesive is often necessary to keep everything in place.
Essential tools and materials:
- Fashion tape of choice
- Scissors
- Clean, dry towel
- Alcohol wipes (optional)
- Mirror for precise application
- Lint roller to remove any debris from the garment
Before applying fashion tape, it’s important to prepare your skin:
- Cleanse the area with mild soap and water
- Dry thoroughly
- Avoid applying lotions or oils to the area
- If needed, use an alcohol wipe to remove any residual oils
- Ensure the area is free from any powders or makeup residue
Pro tip: Always perform a patch test with the fashion tape on a small area of skin at least 24 hours before use to check for any adverse reactions. This is especially important if you have sensitive skin or are trying a new brand of tape.
Step-by-Step Guide: How to Use Fashion Tape for Plunging Necklines
Positioning Your Garment
- Put on your garment and adjust it to your desired position
- Identify the areas where tape will be needed for support
- Use safety pins to temporarily hold the garment in place if necessary
Measuring and Cutting the Tape
- Estimate the length of tape needed for each section
- Cut strips slightly longer than necessary – you can always trim excess later
- For curved areas, cut smaller strips to follow the contour
- Create a few extra strips as backups in case of mistakes
Applying Fashion Tape to Your Skin
- Peel off one side of the tape backing
- Starting from the center of your chest, apply the tape outward
- Press firmly to ensure good adhesion
- Repeat on the other side, ensuring symmetry
- Use a mirror to check for even placement
Securing the Garment with Fashion Tape
- Remove the remaining backing from the tape
- Carefully position the garment over the tape
- Press the fabric onto the tape, smoothing out any wrinkles
- Hold for a few seconds to ensure a strong bond
- Gently tug on the garment to test the hold
Adding Extra Support for Larger Busts
For those with larger busts, additional support may be necessary:
- Apply horizontal strips along the underside of the breast
- Use vertical strips for extra lift
- Consider using stronger tape or multiple layers for heavier fabrics
- Create a supportive “sling” effect by applying tape in a U-shape under each breast
Tips and Tricks for Using Fashion Tape with Different Necklines
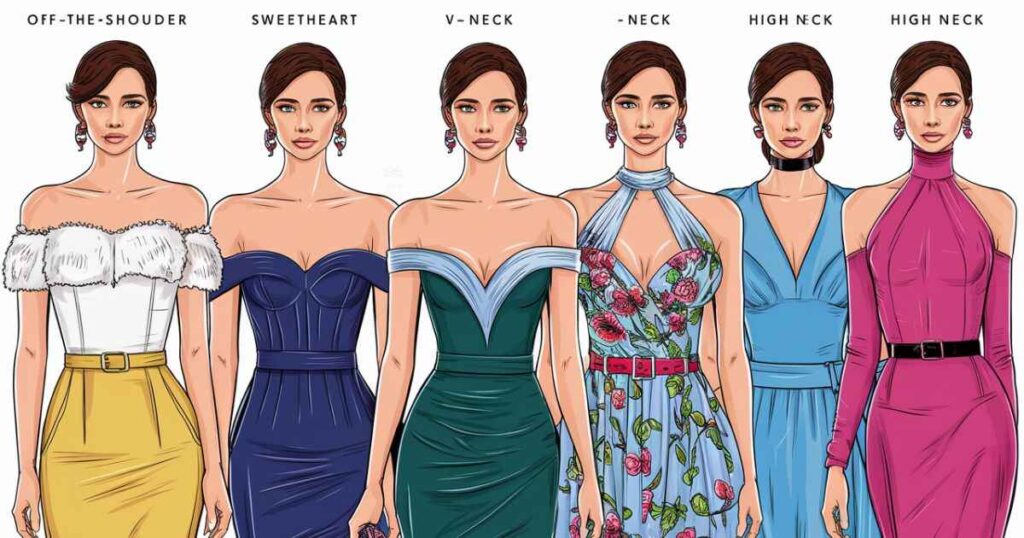
Deep V-necks
- Apply tape in a V-shape, following the neckline
- Use additional strips along the sides for extra security
- Consider creating a crisscross pattern for enhanced support
Wrap Dresses and Tops
- Secure the inner layer first
- Apply tape along the entire edge of the wrap
- Use extra tape at stress points where the fabric might gap
- Add horizontal strips across the bust area for additional hold
Backless Dresses
- Create a crisscross pattern with tape for added support
- Apply tape along the sides to prevent gaping
- Use longer strips that extend from the front to the back for comprehensive coverage
One-shoulder Designs
- Use tape to secure the top edge of the garment
- Apply additional tape under the arm to prevent shifting
- Create a diagonal strip from the shoulder to the opposite side of the torso for balance
Common Mistakes to Avoid When Using Fashion Tape
- Using too little tape: It’s better to use more tape than risk a wardrobe malfunction
- Applying tape to dirty or moisturized skin: This can reduce adhesion and cause the tape to fail
- Not testing the tape beforehand: Always do a patch test and practice application before an important event
- Forgetting to remove the tape properly: Improper removal can damage skin or fabric
- Ignoring the weight of the fabric: Heavier materials require stronger tape or more strips
- Applying tape too tightly: This can cause discomfort and restrict movement
- Not considering body heat and sweat: Choose appropriate tape for your environment and activity level
Removing Fashion Tape Safely
To remove fashion tape without damaging your skin or garment:
- Gently peel the tape off at a 45-degree angle
- If resistant, use warm water or oil-based products to loosen the adhesive
- Take your time and be patient to avoid skin irritation
- For stubborn residue, use a specialized adhesive remover
Aftercare for your skin:
- Cleanse the area with mild soap and water
- Apply a moisturizer to soothe and hydrate the skin
- If irritation occurs, use a gentle, unscented lotion or aloe vera gel
Fashion Tape Alternatives for Plunging Necklines
While fashion tape is versatile, there are other options for securing plunging necklines:
| Alternative | Pros | Cons |
| Adhesive bras | Provides shape and support | Limited to specific cup sizes |
| Silicone pasties | Invisible under thin fabrics | Minimal support for larger busts |
| Body adhesives | Strong hold for heavier fabrics | Can be messy to apply and remove |
| Built-in bra | Integrated support | Limited to specific garments |
| Seamless underwear | Smooth lines under clothing | May not provide enough support for deep neckline |
Case Study: Celebrity Fashion Tape Tricks
Many celebrities rely on fashion tape to pull off daring red carpet looks. For example, Jennifer Lopez is known for her plunging necklines and has openly discussed using fashion tape to prevent wardrobe malfunctions. Her stylists often use a combination of fashion tape and body adhesives to ensure her revealing gowns stay in place throughout long events and performances.
Key takeaways from celebrity fashion tape use:
- Layer multiple types of tape for maximum security
- Use clear tape for sheer or light-colored fabrics
- Apply tape in strategic patterns to create lift and shape
- Always have backup tape on hand for touch-ups
FAQ About Using Fashion Tape for Plunging Necklines
Q: How long does fashion tape last?
Most fashion tape will last for several hours, but factors like sweat, movement, and fabric weight can affect longevity. High-quality tapes can last up to 12 hours or more.
Q: Can I reuse fashion tape?
Fashion tape is designed for single use. Attempting to reuse it may result in reduced adhesion and potential wardrobe malfunctions.
Q: Is fashion tape safe for sensitive skin?
Many brands offer hypoallergenic options, but always do a patch test first if you have sensitive skin. Look for tapes specifically labeled as gentle or suitable for sensitive skin.
Q: Can I use fashion tape with different fabrics?
Yes, fashion tape works with most fabrics, but heavier materials may require stronger tape or multiple strips. Be cautious with delicate fabrics like silk, as some tapes may leave residue.
Q: How to use fashion tape in hot or humid weather?
Look for sweat-resistant or extra-strength options, and consider applying a thin layer of antiperspirant to the skin before taping. Some brands offer waterproof varieties specifically designed for these conditions.
Q: Can fashion tape damage my clothes?
When used correctly, fashion tape should not damage most fabrics. However, always test on an inconspicuous area first, especially with delicate or expensive garments.
Conclusion
Mastering the art of using fashion tape for plunging necklines opens up a world of daring fashion choices. By following this guide, you’ll be well-equipped to confidently wear those low-cut styles without fear of wardrobe malfunctions. Remember to choose the right tape for your needs, prepare your skin properly, and apply the tape with care. With practice, you’ll become a pro at using fashion tape, allowing you to rock plunging necklines with ease and confidence.
Embrace your style, and let fashion tape be your secret weapon for pulling off those show-stopping plunging necklines! Whether you’re attending a glamorous event, going on a date, or simply want to feel fabulous in your everyday life, fashion tape can give you the security and confidence to wear what you love without worry.

Ella Marie is a dedicated fashion enthusiast committed to curating the latest trends and timeless styles. With a keen eye for detail and a passion for elegance, they ensure every visitor finds inspiration and sophistication on the site.